Ajax for fun

May 14th, 2009

Ajax (Asynchronous JavaScript and XML) allows You to make a lot of nice effects. Using rico and prototype libraries it is very simple to write some funnny game like this.
I wrote this javascript game in a few thanks to a removed post on http://www.janeirostudio.com website and the ImageMagik command

$ convert orchis_360.jpg -crop 90×90 orchis

to split the main image into 16 sub-images.

redirecting a TCP connection using iptables

May 8th, 2009

Yesterday I was requested to redirect the traffic to the 80 TCP port of an host to the TCP 8080 port of a second host just for some hours. Thanks to iptables it was been very easy.
First it’s better to enable port forwarding:

# echo 1 >/proc/sys/net/ipv4/ip_forward

Then here comes some iptables commands and rules:

# iptables -F
# iptables -X
# iptables -t nat -F
# iptables -t nat -X
# iptables -t mangle -F
# iptables -t mangle -X
# iptables -P INPUT ACCEPT
# iptables -P FORWARD ACCEPT
# iptables -P OUTPUT ACCEPT

# iptables -t nat -A PREROUTING  -p tcp -m tcp -d HOST1 –dport PORT1 -j DNAT –to-destination HOST2:PORT2
# iptables -t nat -A POSTROUTING -p tcp -d HOST2 –dport PORT2 -j MASQUERADE

If You like, just download this simple shell script.

To display the nat rule:

# iptables -t nat -n -L

many thanks to cyberciti.biz and Chris Siebenmann‘s wiki.

Joining a Debian Lenny Box to a M$ Active Directory Domain

May 7th, 2009

Install the software You need:

# apt-get install samba-common heimdal-clients winbind ntpdate ntp samba

set the right timezone and the righ system time

# /etc/init.d/ntp stop
# dpkg-reconfigure tzdata
# ntpdate your.domain.controller

then insert Your domain controller into the time servers list:

# vi /etc/ntp.conf

add in the right place the line

# You do need to talk to an NTP server or two (or three).
#server ntp.your-provider.example
server your.domain.controller
# /etc/init.d/ntp start

Edit Your file /etc/krb5.conf

# cat /etc/krb5.conf
[libdefaults]
default_realm = DOMAIN.NAME
clockskew = 300
[realms]
DOMAIN.NAME = {
kdc = your.domain.controller IP Address
admin_server = your.domain.controller IP Address
}

Edit Your file /etc/samba/smb.conf

# cat /etc/samba/smb.conf
[global]
realm = DOMAIN.NAME
workgroup = domain
security = ADS
idmap uid = 10000-20000
idmap gid = 10000-20000
template shell = /bin/bash
template homedir = /home/%D/%U
winbind use default domain = yes

[homes]
valid users = %U

check your modification with

# testparm

and then

# mkdir /home/DOMAIN

Then edit the /etc/nsswitch.conf file:

passwd:        files winbind
group:          files winbind
#passwd:         compat
#group:          compat

Now issue the command:

# net ads join -U DomainAdminUsername -W DOMAIN.NAME

Ignoring the error notice saying something like “Unable to perform DNS Update”.

Then restart some services:

# /etc/init.d/samba restart
# /etc/init.d/winbind restart

And verify You have joined the Domain, e.g. asking for some data to be displayed:

# wbinfo -u |xargs getent passwd

… and remember to modify theese files

# cat /etc/pam.d/common-account:
account    sufficient    pam_winbind.so
account    required    pam_unix.so

# cat /etc/pam.d/common-auth:
auth    sufficient    pam_winbind.so
auth    required    pam_unix.so use_first_pass

# cat /etc/pam.d/common-session:
session    required    pam_mkhomedir.so skel=/etc/skel/ umask=0022
session    sufficient    pam_winbind.so
session required    pam_unix.so
Static IP address for a VirtualBox Debian Lenny

May 6th, 2009

In order to give a static adress instead of the DHCP assigned one, You can chose bridge network in the mail VirtualBox Control panel for You host (in settings -> Network).

If during the boot You see the error

SIOCSIFADDR: no such device
eth0 ERROR …. etc….

maybe You have a wrong MAC address in your file /etc/udev/rules.d/70-persistent-net.rules matching the eth0 interface. So verify

  • the MAC address assigned by VirtualBox from the VirtualBox console,
  • the MAC showed by /sbin/ifconfig and
  • the /etc/udev/rules.d/70-persistent-net.rules file one assigned to eth0.

Obviously the MAC address for this interface have to be the same!

Cloning a VirtualBox host

May 6th, 2009

VirtualBox is a very nice GPL alternative to vmWare if You are looking for a general-purpose x86 hardware virtualizer.

The VirtualBox Installation is very easy: in many case You have only to download the righ file (.rpm, .deb, etc…) and install it as a normal software package.

If You need to clone quickly a virtual host, stop this, then cd where your system are storing your virtual box hard disk and issue the command VBoxManage specifying the action (clonehd), the input file name (the virtual hard disk file), and the output file. E.G.

cd ~/.VirtualBox/HardDisks
VBoxManage clonehd vbox-lenny1.vdi vbox-lenny2.vdi

This command duplicates a registered virtual hard disk image to a new image file with
a new unique identifier (UUID), that will be shown at the end of the copy output:

VirtualBox Command Line Management Interface Version 2.2.2
(C) 2005-2009 Sun Microsystems, Inc.
All rights reserved.

0%…10%…20%…30%…40%…50%…60%…70%…80%…90%…100%
Clone hard disk created in format ‘VDI’. UUID: 42bf1adb-e7f7-4993-b8e8-739aca77e092

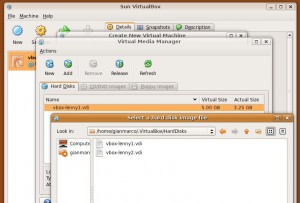
Then, from Your VirtualBox main console, start the new host wizard, followin the defaults just to the point to specify Your hard disk. Here check for “Use existing hard disk” and browse to look for the file You have just created with the VBoxManage clonehd command.
Remember You have to click on the “Add” icon to see and import your new hard disk file.

vbox-hd-clone

Then, just end the wizard and start your new virtual host.

ORA-01034 and ORA-27121 on CentOS5

April 30th, 2009

getting the error

ERROR: ORA-01034: ORACLE not available ORA-27121: unable to determine size of shared memory segment Linux Error: 13: Permission denied

on a CentOS 5 Oracle box, You can fix it with changing a file permission:

chmod 6751 $ORACLE_HOME/bin/oracle

Dreadful, is’t it? 😉

Fight the spam with ASSP

April 17th, 2009

I’ve just beginned the test of ASSP (Anti Spam SMTP Proxy) in a 1000 mailboxes organization.

I’ve set up a very small Ubuntu server on a virtual vmware host (512 Mbytes of RAM, 1 processor, 10 Gbytes of disk), and then I’ve followed the quick installation steps.
In a few minutes I was able to move all incoming mail traffic into my new SMTP proxy.
Monitoring the situation in the web interface at 55555 port of the Ubuntu box, it looks all ok.
Log files on the real mail server are showing all is running ok, too.

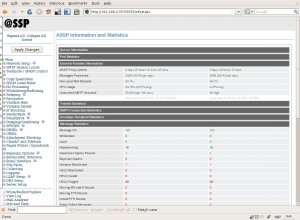
Info and Stats page of ASSP web Interface

I’m very happy of this experiment: I found ASSP a good spam fighter, easy to install and configure and with a nice web interface for configuration and monitoring the SMTP traffic.

virus filtering on courier-mta

March 23rd, 2009

A simple way to add virus filtering on a mail server running courier-mta.

  1. install clamav , a good free virus scanner.
    You may download it following this link: http://www.clamav.net/download/sources
    Follow instructions in the downloaded package for a correct install, usually  You need only to create clamav user, clamav group, then
    mkdir /var/lib/clamav (or whatever is set as clamav home dir in /etc/passwd)
    chown clamav:clamav /var/lib/clamav
    open clamav package, cd clamav package
    ./configure
    make
    make install
  2. install python-dev package (apt-get install python-dev)
  3. install pyClamd
    wget http://xael.org/norman/python/pyclamd/pyclamd.py
    cp pyclamd.py /usr/lib/python2.3/site-packages/
  4. install courier pythonfilter
    Standard installation steps are:
    python setup.py install
    mkdir /var/lib/pythonfilter
    chown daemon:daemon /var/lib/pythonfilter
    ln -s /usr/bin/pythonfilter /usr/lib/courier/filters
    filterctl start pythonfilter