
Nama
Easy multitrack recording with Ecasound
Nama's GUI is ugly. There, I've said it. At least, you can change the default colors.
On the positive side, the GUI offers basic functionality: recording, playback, effects, marks. Sliders are a convenient way of setting effect parameters. You'll use text commands to do fancy stuff like buses, inserts, regions, etc.
The first group of shots show the mixer window. All of those letters on the right side of the track display (EF P1 P2 L1 L2 L3 L4) are buttons for accessing Ecasound effects, Ecasound presets, and LADSPA plugins. The GROUP control below the Mixdown track is a global setting that influences all user tracks. The Palette and Namapalette buttons on the upper right are for selecting colors.
Mixer Window - Rec
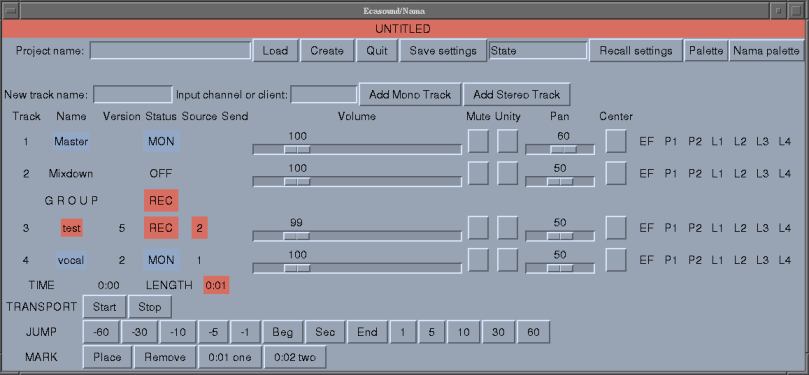
The track in red is ready to record a file track_4.wav from soundcard input 2, the track in blue is set to play back vocal_2.wav. (The version number is automatically incremented.) Red in the top band indicates a live input will be recorded. Yellow means mixdown pending, green means playback only.
The Effects Window - Basic
Ecasound and LADSPA provide Nama's effects-processing. At the bottom, a MIDI controller is applied to control the delay time of a flanger effect on the guitar track. At the top, a reverb effect is applied to what is now called the Master track. Additional effects on a track scroll off to the right.

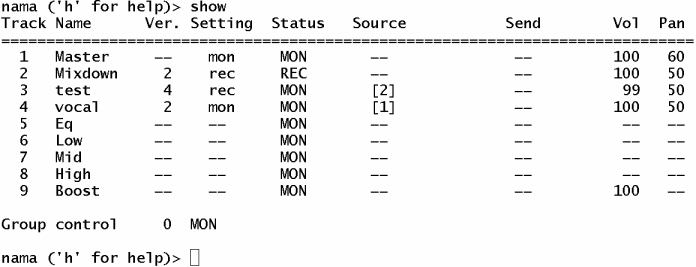
Text Display
Like Ecasound, Nama can be run entirely from a terminal. Here is the output of
the show_tracks command, with mastering mode enabled. (Most commands have
abbreviations. show_tracks can be abbreviated to show.)
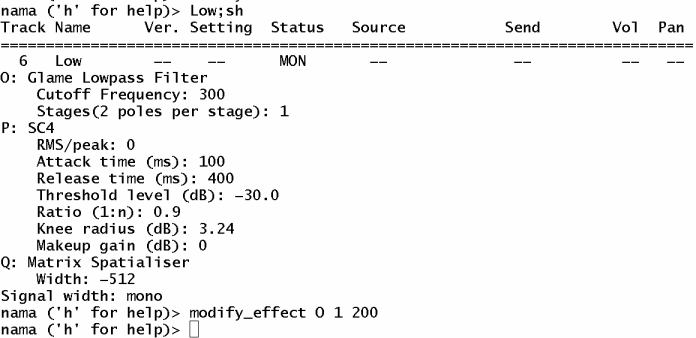
Information about one track is displayed with the show_track (sh) command.
Here is the display for the low-frequency branch of the mastering network. The
command being typed at the prompt sets the first parameter of effect "O" (the
lowpass filter) to 200 Hz.
The help screen is two keystrokes away.